Feature Overview
- Launch your existing agent as an embeddable web widget with zero additional hosting.
- Switch agencies on the fly by updating the widget in the dashboard — no code redeploy needed.
- Personalize every deployment with optional
additionalInstructionsthat shape the assistant’s behavior per site.
Prerequisites
- Deployed Agency in the Agencii dashboard.
Quick Start
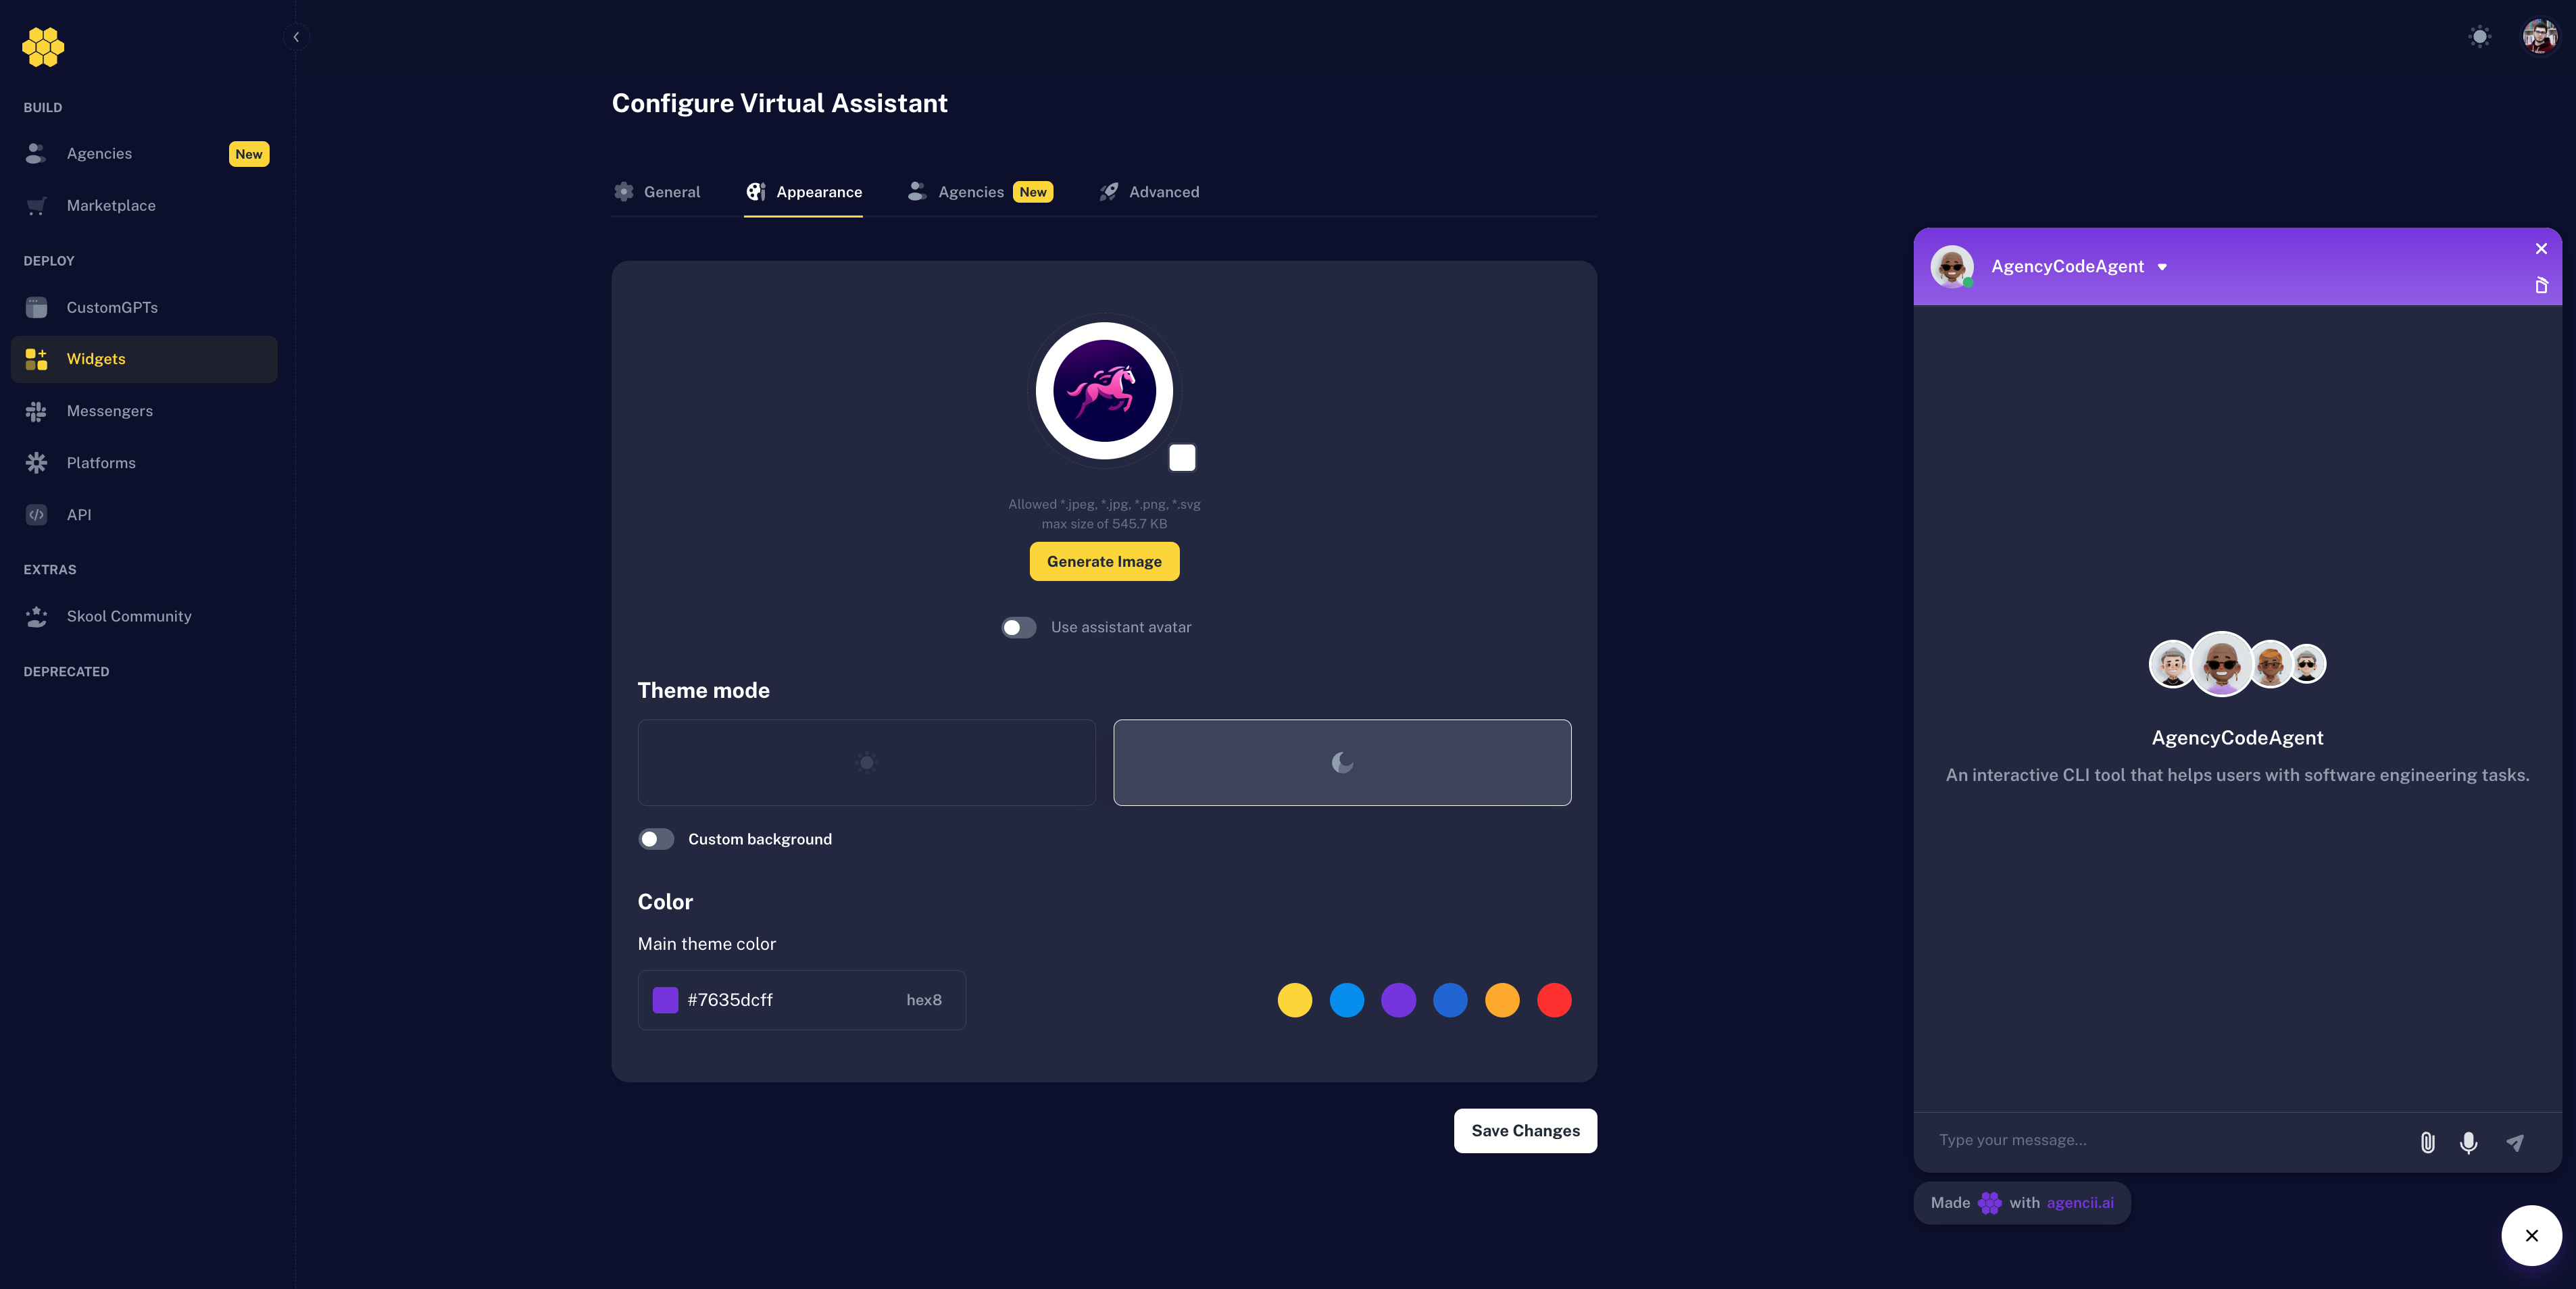
Create a new widget
- In the Agencii dashboard, open Deploy → Widgets and create a new widget.
- Configure the widget’s name, description, position and conversation starters.
- Customize the widget’s appearance by choosing a theme mode, logo, and color scheme.
- Select the agency and any selectable agents.
- Configure advanced settings such as Allowed Domains and auto-open behavior as needed.
- Save changes.
- Test your widget!
Embed the widget
- In the Agencii dashboard, open Deploy → Widgets and find the widget you created.
- Click the three-dot menu on the right side of the widget row and select Embed.
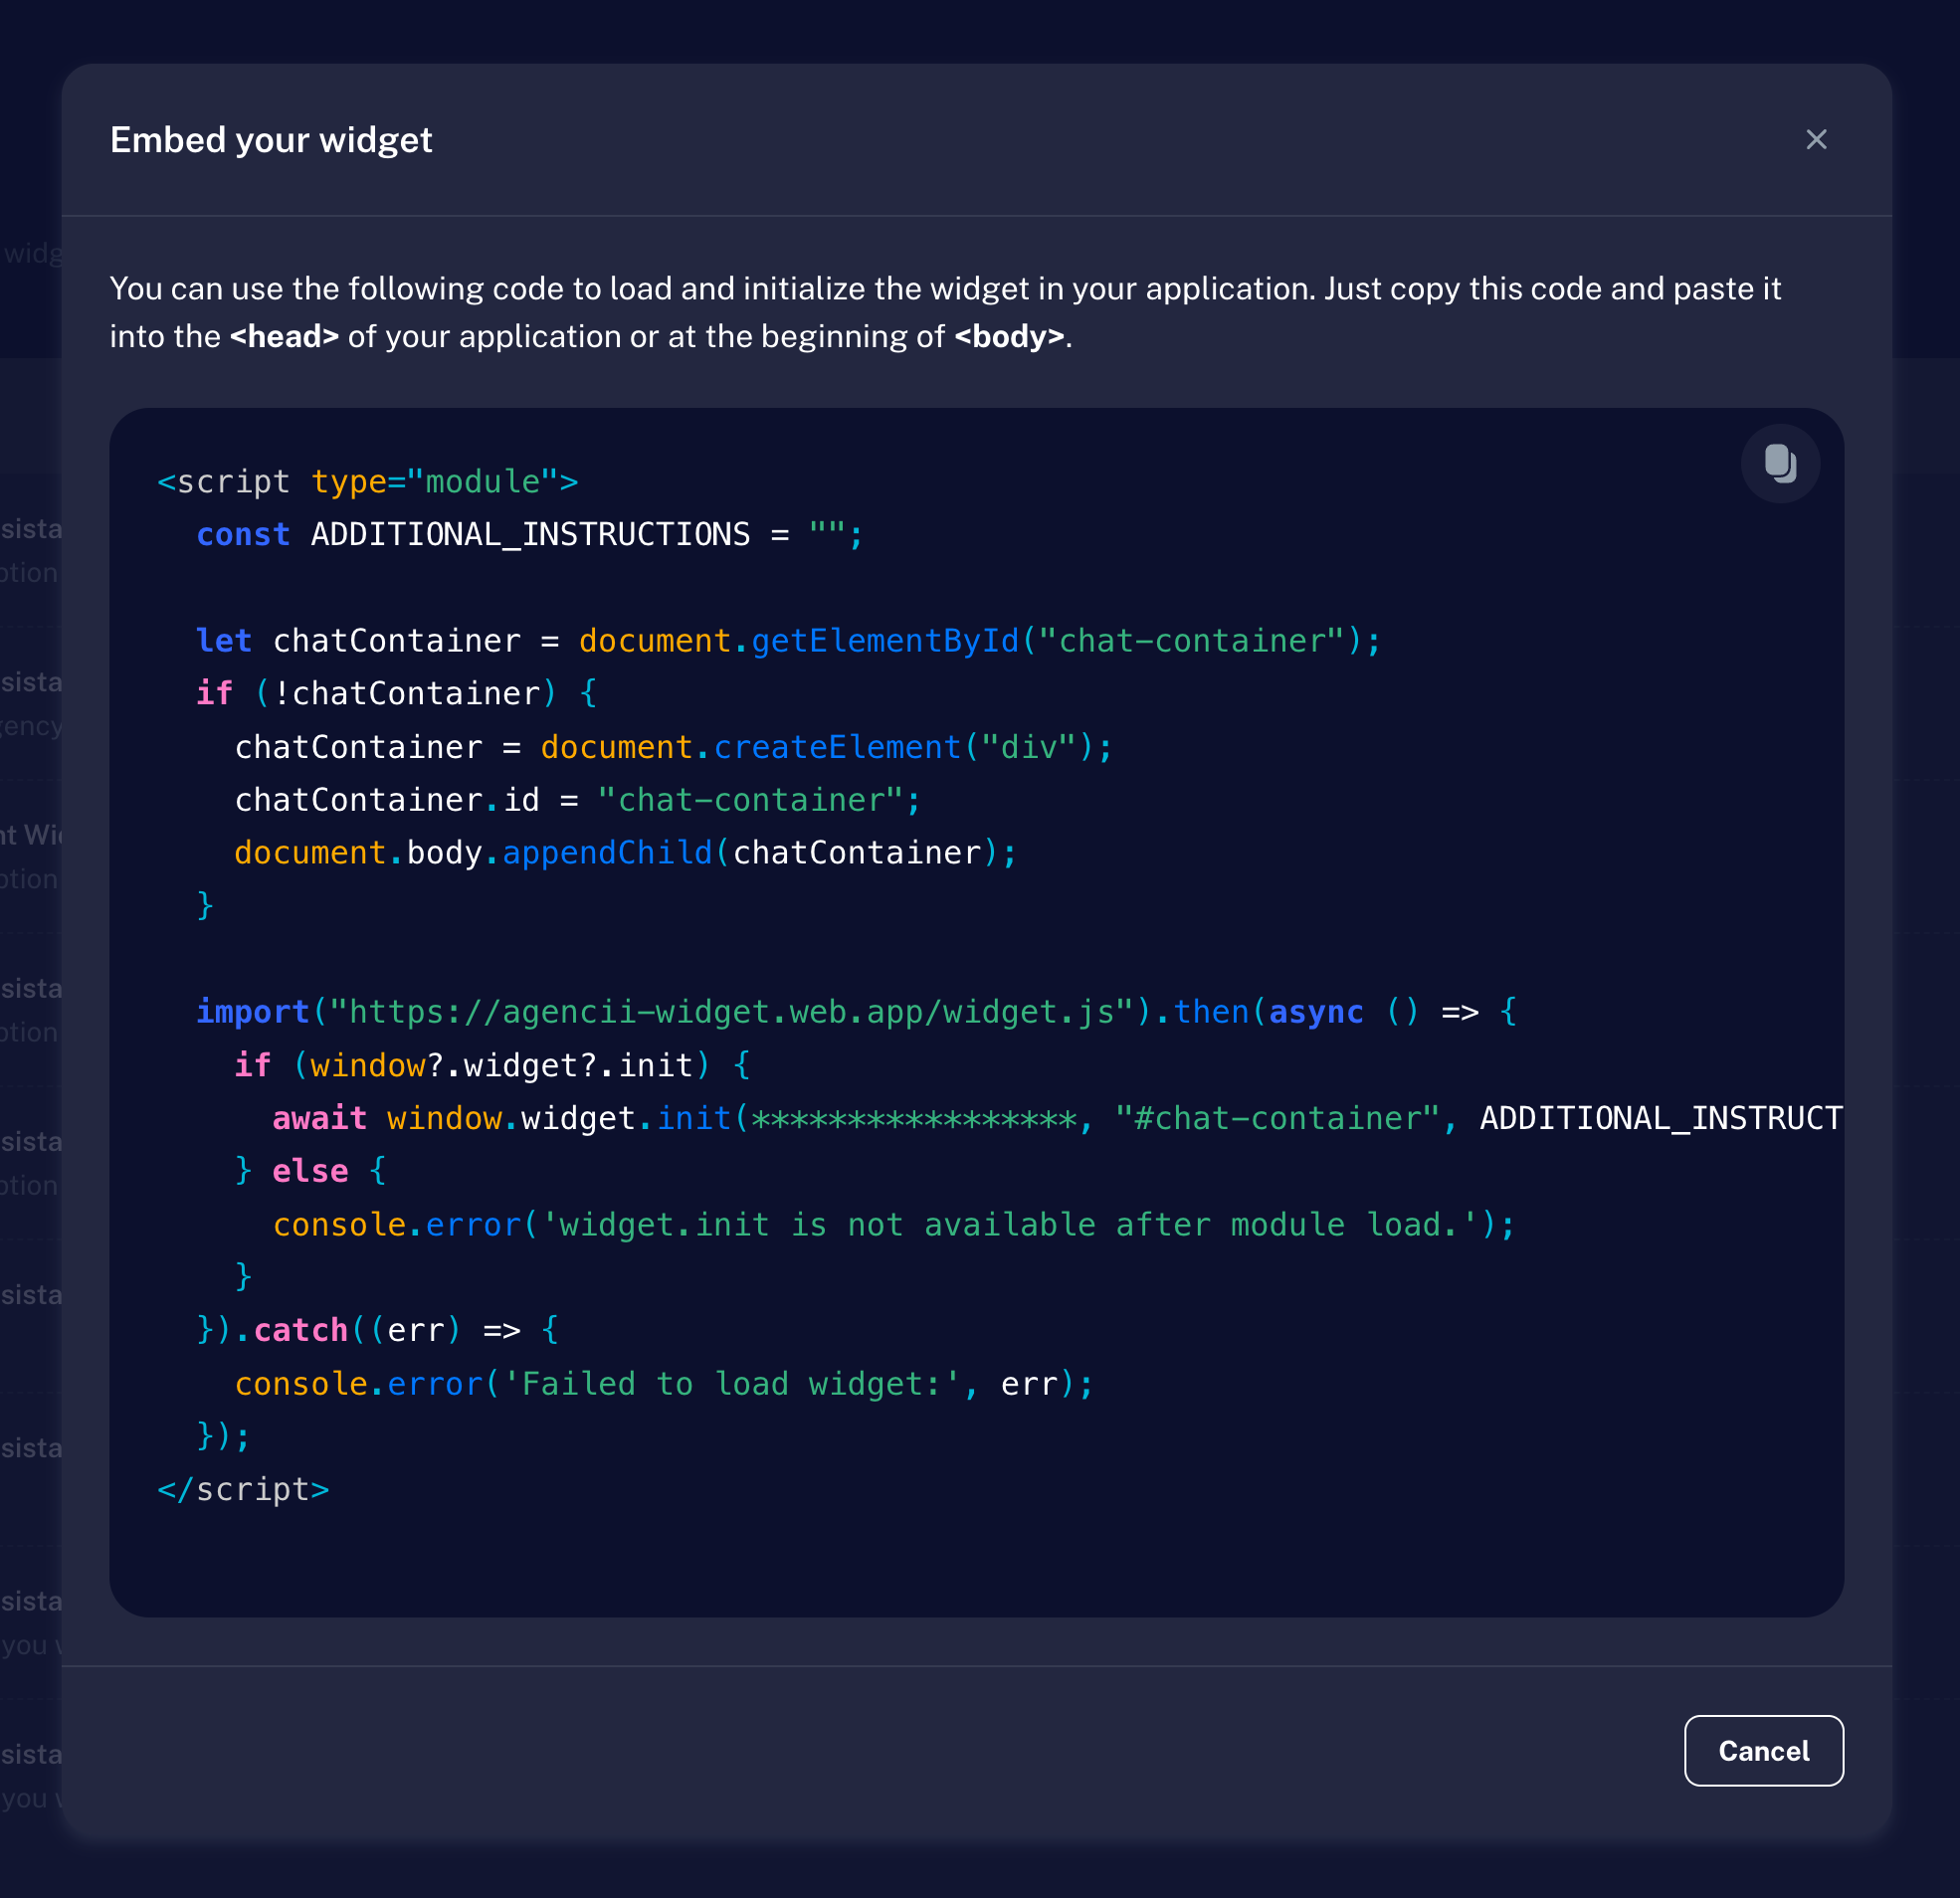
- Copy the embedding script.
- Paste the script into your website’s HTML file (or adjust the script to your needs).
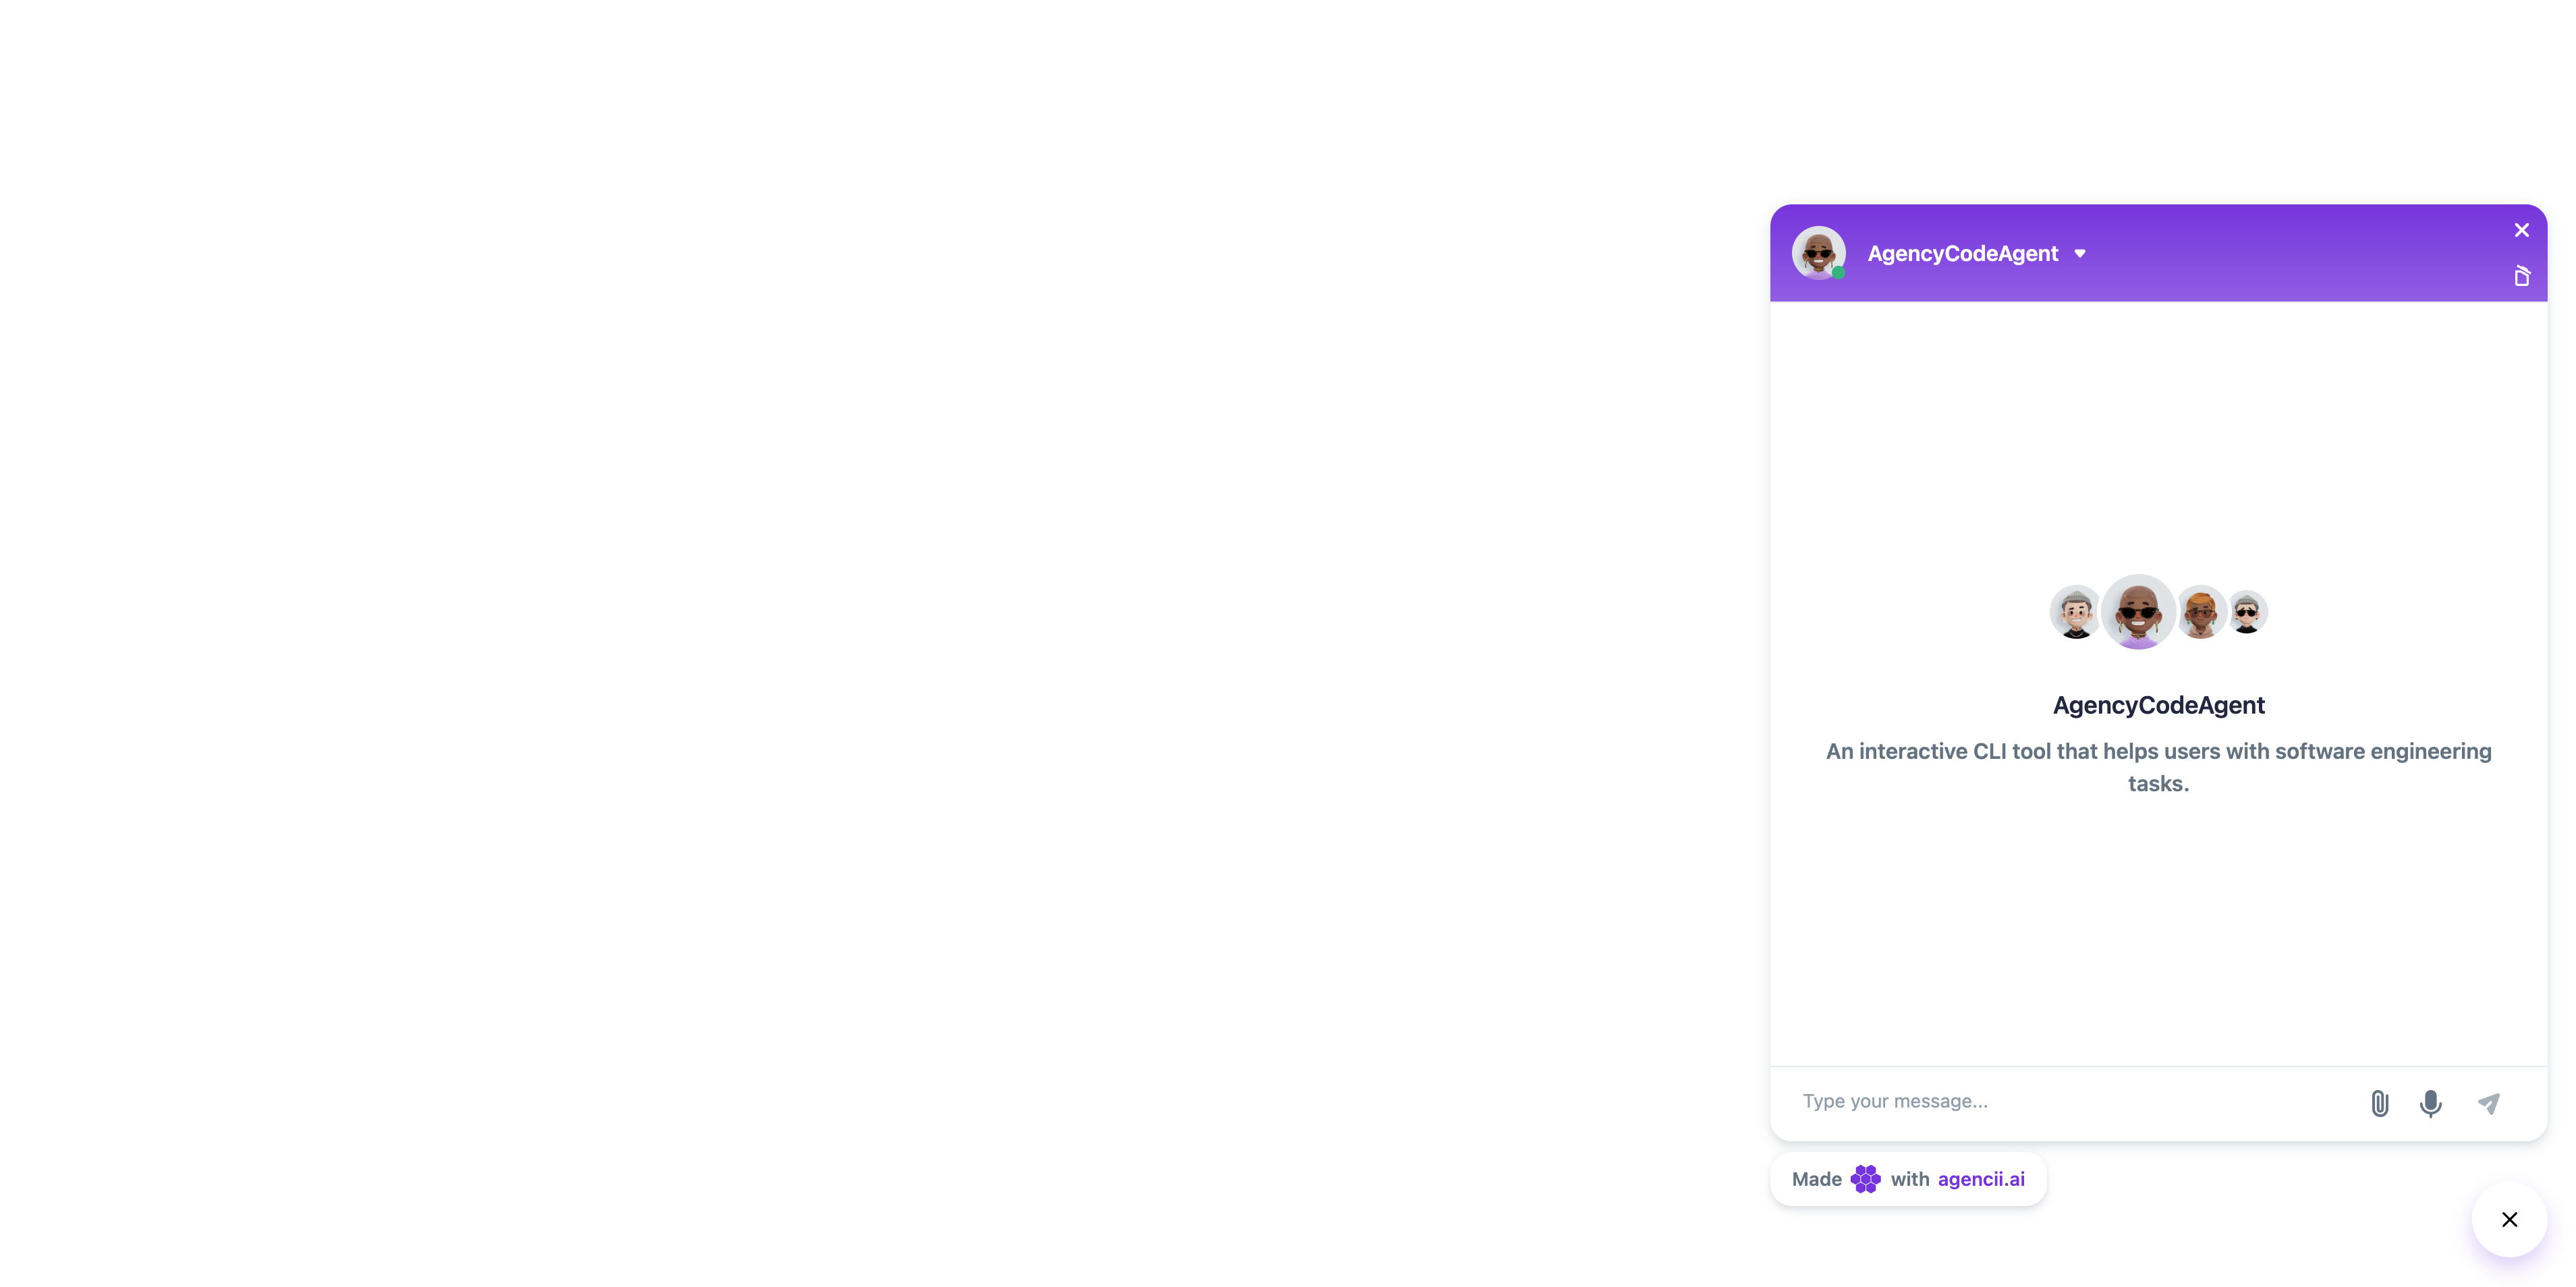
- Load the page and confirm the widget works as expected.
Widget Controls
You can control the widget from your site/app by dispatching aCustomEvent named “widget-control” on window with a detail payload. The widget listens for this event and performs the requested action.
Event name: widget-control
Payload shape (TypeScript)
Payload shape (TypeScript)
The widget must be initialized on the page. Replace
WIDGET_ID with the identifier from your embed script.Commands
Open or close the widget
Opens or closes the widget UI. Type:open-widget
Data: boolean — true to open, false to close.
Examples
Examples
Typical use cases
- Bind to a “Chat” / “Support” button to open the widget.
- Close the widget after a route change or when a modal shows.
Set widget context
Sets persistent context for all future messages — both programmatic (send-message-to-widget) and user-typed.
Type: set-widget-context
| Property | Type | Required | Description |
|---|---|---|---|
userContext | object | No | Structured data (user IDs, preferences, feature flags) passed to Agency Context. Accessible within tools but not exposed to the LLM. |
additionalInstructions | string | No | Extra guidance for the agent on all subsequent requests. |
Example
Example
Send a message to the widget
Programmatically sends a text message into the widget (e.g., seed a greeting or pass context). This event does not open the widget automatically, so dispatch anopen-widget event first.
Type: send-message-to-widget
| Property | Type | Required | Description |
|---|---|---|---|
data | string | Yes | The message body to send. |
userContext | object | No | Structured data (user IDs, preferences, feature flags) passed to Agency Context. Accessible within tools but not exposed to the LLM. Overrides any context set via set-widget-context. |
additionalInstructions | string | No | Extra guidance for the agent on this specific request. Overrides any instructions set via set-widget-context. |
Examples
Examples
Multiple Widgets on One Page
If you embed multiple widget instances, dispatch events with the specificwidgetId you want to control. The widget code should internally ignore events addressed to other IDs.